
Repotting my jade plant (Crassula ovata) is one of my favorite rituals as a plant parent. There’s something satisfying about giving it fresh soil, a slightly bigger pot, and watching it perk up instantly. Jade plants are hardy, low-maintenance succulents, but repotting correctly is key to keeping them healthy and thriving.
In this guide, I’ll walk you through how I repot my jade plants, the tools I use, and tips for ensuring a smooth transition for the plant.
Why Repotting Jade Plants Is Important
Jade plants grow slowly, but over time:
- Roots can become cramped in their pots (root-bound)
- Soil can lose nutrients and drainage ability
- Old soil may retain too much moisture, increasing risk of rot
- Fresh soil encourages growth and vitality
Repotting ensures your jade plant has enough space, fresh nutrients, and well-draining soil for continued growth.
When to Repot a Jade Plant
I usually repot my jade plant every 2–3 years, or if:
- The plant has outgrown its pot
- Roots start growing out of drainage holes
- Soil becomes compacted or retains too much water
- The plant looks top-heavy or unstable
Spring or early summer is the best time to repot, as jade plants are actively growing and recover faster.
Tools and Materials I Use
Here’s what I keep handy when repotting:
- Sharp, sterilized scissors or pruning shears
- Well-draining succulent or cactus soil
- Pot with drainage holes (slightly larger than the previous one)
- Gloves (optional, for comfort)
Step-by-Step Guide: How I Repot My Jade Plant
1. Remove the Jade Plant from Its Pot
I gently tilt the pot and tap the sides until the plant slides out.
If roots are stuck, I use a small tool to loosen the soil.
2. Inspect and Trim the Roots
I check for:
- Dead or rotting roots (soft, black, or mushy)
- Overly long or circling roots
I trim unhealthy roots with sterilized scissors, which prevents rot and encourages healthy growth.
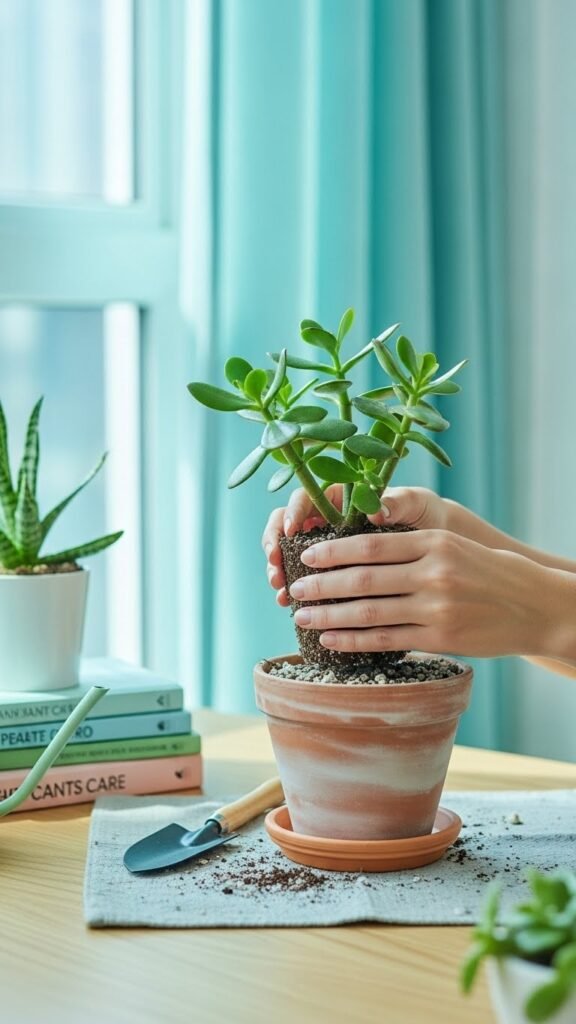
3. Choose the Right Pot
I pick a pot that’s 1–2 inches larger in diameter than the current one.
Drainage holes are essential — jade plants hate sitting in water.
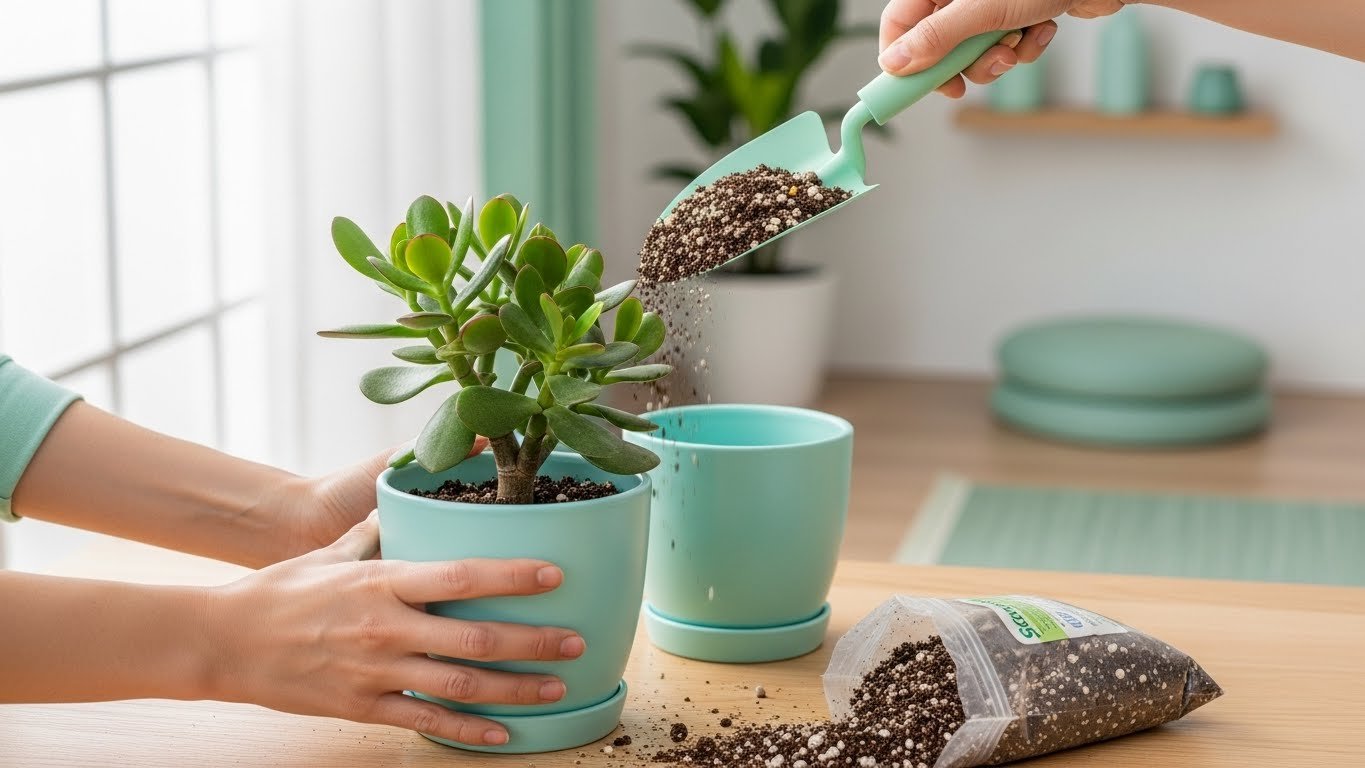
4. Prepare the Soil
I use a well-draining succulent mix, sometimes adding perlite or sand.
This ensures water passes through quickly and prevents root rot.
5. Place the Jade Plant in the New Pot
I center the plant and fill around the roots with soil, gently pressing down but not compacting too much.
I leave a small gap at the top to make watering easier.
6. Water Lightly
After repotting, I water lightly to help the soil settle around roots.
Overwatering at this stage can harm the plant — I usually wait a week before normal watering.
7. Position in Bright, Indirect Light
I place my repotted jade plant in a bright, indirect light spot for the first week.
Too much direct sun can stress the plant after repotting.
Tips I Follow for Successful Repotting
- Avoid repotting during winter — jade plants grow slowly then and recover slowly.
- Handle leaves gently; jade leaves are thick but can break.
- If the plant is top-heavy, support it temporarily until roots anchor.
- Use pots with good airflow around the base to prevent moisture buildup.
Common Mistakes to Avoid
❌ Using a pot that’s too large — can lead to soggy soil
❌ Overwatering immediately after repotting
❌ Not trimming dead or circling roots
❌ Using heavy, clay-rich soil that retains water
Aftercare: How I Keep My Repotted Jade Happy
- Wait 1 week before watering heavily
- Keep in bright, indirect light
- Avoid fertilizing immediately — wait 2–3 weeks
- Dust off leaves for photosynthesis
Final Thoughts
Repotting your jade plant might seem intimidating, but with the right approach, it’s straightforward and rewarding. A fresh pot, healthy soil, and some TLC help your plant thrive and look its best.
After each repot, I notice my jade plant looks happier, its leaves perkier, and it seems to “breathe” better. Repotting isn’t just about plant health — it’s a chance to bond with your greenery and enjoy the art of indoor gardening.