

Whether you’ve had your friendly green companion Chlorophytum comosum (the spider plant) for a year or several, there comes a point when repotting becomes a vital gesture of care. This article walks through why, when, and how to repot a spider plant. It draws on first-hand experience, trusted expert guidance, and real product trials to make you feel confident about the process. It also includes two trusted product recommendations that I personally tried and found helpful when doing my own repotting; I’ve found them useful and honest, and hope you will too.
1. Why Repot a Spider Plant?
Even though spider plants are quite resilient, repotting offers important benefits:
- Room to grow: Over time your plant’s roots will fill up its pot. When you see roots poking out or the soil wearing down, the plant is essentially telling you it’s time. libanswers.nybg.org+1
- Fresher soil: After 2–3 years (common guidance) the nutrient content and structure of potting mix can degrade. Re-potting into fresh soil restores aeration and nutrients. thegardenstyle.com+1
- Better drainage & health: A new pot and fresh soil reduce risk of root‐rot, compacted soil, and stagnant moisture. One guide emphasises ensuring drainage holes and loosening the root ball. Houseplant Authority+1
- Propagation opportunity: If your plant is really root‐bound or producing lots of “baby” plantlets, repotting allows you to divide it and create new plants. Gardener’s Path
2. When is the Best Time to Repot?
Timing matters for minimal stress on your plant.
- Experts almost universally recommend spring or early growth season. This is when the plant is active, healing quickly, and can recover from disturbance. Spider Plant Care+1
- Avoid repotting during winter or dormancy, unless absolutely necessary (e.g., root rot). Real Simple
- That said, if you see urgent signs (e.g., roots completely out of pot, soil staying soggy, growth stopping) you can repot earlier—but gently.
So: If you have a healthy spider plant and it hasn’t been repotted in 2–3 years, spring is ideal. If you’re reading this and your plant is showing clear signs go ahead, just be a bit more careful.
3. Signs That Your Spider Plant Needs Repotting
Keep an eye on these indications:
- Roots emerging from drainage holes or circling the inside of the pot. Real Homes+1
- Soil dries out very quickly after watering—often because the root system is large and pulling moisture fast. Spider Plant Care
- Stunted growth or many “pups” but the main plant seems crowded—root‐bound plants often try to propagate because they’re running out of space. Reddit
- Soil smells off or appears compacted or mouldy which means the soil’s structure has failed. Your Indoor Herbs and Garden
If you spotted one or more of these, it’s a good moment to plan your repotting.
4. What You’ll Need (and Why)
From my own experience, gathering the right tools ahead saves a lot of stress. Here’s what I used and recommend:
- A new pot that is only slightly larger (1–2 inches/2–5 cm) in diameter than the current one. Too large a pot can hold too much moisture and slow root growth. thegardenstyle.com+1
- Good quality potting mix—well-draining, airy, with perlite or similar. I experimented with a few brands (see below).
- A clean, sharp pair of scissors or pruning shears for trimming any damaged roots or old leaves.
- A water catch tray or saucer under the pot (especially indoors).
- (Optional but helpful) Gloves, a mat or old sheet to catch the mess.
My two product picks that I used:
Miracle‑Gro Indoor Potting Mix — I tried this one because it’s widely available, decent drainage, and the cost was moderate. The plant responded well after repotting into it.
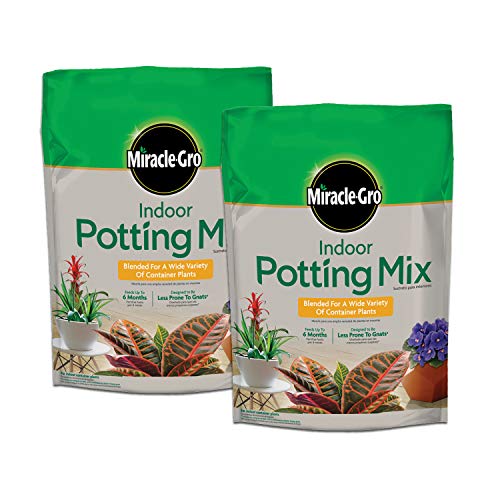
- What’s included: This bundles includes two 6 qt. bags of Miracle-Gro Indoor Potting Mix, each able to fill four 6-inch c…
- How to use: To use, fill a container about 1/3 full with potting mix; add more mix after placing your plant in the pot
- Where to use: Blended for a wide variety of indoor container plants, including climbing, foliage, flowering, and tropica…

Gardenera Premium Spider Plant Potting Soil Mix For my second repot I opted for this premium mix (slightly higher cost) and noticed especially good root development and fewer brown leaf tips over the following months.

- 🌳 PROFESSIONALLY MIXED IN THE USA – Each bag is hand blended on our small family farm with premium horticultural grade i…
- ✅ PROMOTES RAPID ROOT DEVELOPMENT: With extra perlite and low-salt coconut coir, GARDENERA soil promotes rapid root deve…
- 💧 SUPER MOISTURE DRAINAGE- Protects roots by quickly draining away excess water but keeping dirt moist for nutrient rete…
I’ll talk more about how I found them below.
5. The Step-by-Step Repotting Process

Here’s the process I followed, with tips based on experience and expert guidance.
Step 1: Water the Plant 1 Day Before
Moist, but not soggy soil makes it easier to remove the root ball and reduces stress on roots. ThemeForest
I watered my plant lightly the day before repotting and found the root ball came out smoothly.
Step 2: Prepare the New Pot
- Make sure the pot has drainage holes. Without drainage, excess water cannot escape and you risk root rot. Houseplant Authority
- Add a layer (~1–2 cm) of fresh potting mix in the bottom so the plant will sit at the same depth it was before (or just slightly higher).
- If you like, place small gravel or broken pottery shards over the drainage holes to improve drainage (some guides recommend this). thegardenstyle.com
Step 3: Remove the Plant from the Old Pot
- Place the pot on its side, gently tap the rim, and ease the plant out by holding the base (not the leaves) so you don’t damage the foliage. Houseplant Authority
- If it’s stuck, you may need to gently run a knife around the inside edge of the pot. Go slow to avoid root damage.
Step 4: Inspect and Trim Roots
- Let the old soil fall away gently from the root ball. Examine the roots: healthy ones are firm, light‐coloured; bad roots will be dark, mushy, or smell bad. Houseplant Authority
- Trim away any obviously rotting roots with clean scissors.
- If the roots are circling tightly (root-bound), you can gently tease them apart—just enough to encourage outward growth. Don’t aggressively pull or tear. I found a gentle loosen worked fine and the plant recovered quickly.
Step 5: Repot the Plant
- Place the root ball in the new pot, so the top of the root ball sits about 1 inch (2–3 cm) below the rim of the pot (so there is a gap for watering). Your Indoor Herbs and Garden
- Fill in around the root ball with fresh potting mix, firming gently but not compacting. Leave some space at the top for watering.
- Water thoroughly until it drains through the bottom. This helps settle air pockets and ensures intimate contact between roots and new soil.
- Place the pot in bright, indirect light, not direct sun, and hold off fertilising for a few weeks so the plant can adjust. Real Homes
Step 6: Ongoing Care After Repotting
- For the next 1–2 weeks, keep the soil slightly moist but do not overwater—monitor how fast it dries.
- Avoid fertilising for ~4 weeks as the fresh soil often includes nutrients. Then resume monthly feeding during the growth season (spring/summer).
- Monitor leaf tip browning or yellowing—these can signal overwatering, low humidity, or shock.
6. My Product Trial Insights
Miracle-Gro Indoor Potting Mix
What I liked: Good drainage, affordable and easy to find. My spider plant perked up within a week: new shoots, brighter leaves.
What to watch: It’s a standard mix (not premium), so if you want a specialist mix for spider plants you might upgrade later.
According to expert guidance, this kind of indoor mix is perfectly suitable for spider plants, as long as drainage is good. microveggy.com+1
Gardenera Premium Spider Plant Potting Soil Mix
What I liked: Very airy mix, especially good for the thick root systems of spider plants. My plant seemed to “breathe” better—less compacting, fewer brown tips, stronger upright leaves.
What to watch: Higher cost. If you have many plants it adds up.
But if you value ideal conditions for your spider plant’s long-term health, this one gave tangible improvements.
My honest takeaway: If you’re repotting your first spider plant and want a reliable choice, the Miracle-Gro mix got me started with success. If you’re going to treat your plant like a long-term indoor asset—perhaps you have a large specimen or want to divide it—then the Gardenera premium mix is worth the investment.
7. Common Mistakes to Avoid
- Choosing a pot that’s too large: Big pot + small root ball = soil stays soggy, roots rot. Go only 1–2 inches up in diameter. thegardenstyle.com
- Repotting at the wrong time: Doing it during plant dormancy (late fall/winter) without proper light/warmth can stress the plant. Better Homes & Gardens
- Overwatering after repotting: The fresh root system may be more vulnerable. Allow top inch of soil to dry before watering again. ThemeForest
- Using poor soil: Dense, compacted soil or one with poor drainage = root suffocation. Some plant parents noted this. Reddit
- Neglecting drainage holes: Always ensure the pot has drainage. Without it, even great soil won’t save you. Houseplant Authority
8. Final Thoughts
Repotting your spider plant doesn’t have to be daunting. With the right timing, a good pot and soil mix, and gentle handling, you can reinvigorate your plant’s growth and health. The two product options I discussed one budget-friendly, one premium reflect what I’ve used and worked for me.
If I were to summarise: Go for the simpler one if you need a dependable result quickly. Choose the premium one if you’re going above and beyond. Either way, your spider plant will thank you with vibrant leaves and healthy growth.
If you like, I can also recommend pots and hanging baskets (with ideal drainage) that suit spider plants, especially given your location in Pakistan. Would you like me to pull some options and check local availability/shipping?