

If you love indoor greenery, you’ll quickly notice how the elegant Chlorophytum comosum (commonly called the spider plant) produces trailing baby offshoots. These little “spiderettes” make propagation incredibly fun and rewarding. While propagation in water is popular, using soil offers certain benefits — better long-term root health, less risk of stem rot, and a faster transition to a full pot.
This guide explains exactly how to propagate spider plants in soil, what to watch out for, and how to make sure your new plants thrive based both on real experience and trusted plant science.
🌱 Why Choose Soil Propagation?
While some growers love hydroponic or water methods, soil propagation offers distinct advantages:
- The young plantlets start developing in a medium that mimics their future permanent home — reducing transplant shock.
- Roots that form in soil tend to be stronger and deeper, which means the new plants settle faster.
- There’s less risk of over-watering or stem rot once the cutting is buried in fresh potting mix.
In fact, horticultural guidance points out that spider plants will produce plantlets best when they are “slightly pot-bound” and in a well-draining soil. Wisconsin Horticulture+1
From my own experience: I’ve propagated dozens of spider plants, and the ones potted directly in soil often outpace the ones started in water. They flower earlier, produce more offshoots, and look healthier.
🛠 Supplies You’ll Need
Before you begin, gather the following:
- A healthy mother plant with visible spiderettes (baby plantlets).
- Sharp, clean scissors or pruning shears (sterilized).
- Small pots (2 – 3 inch) with drainage holes.
- A well-draining potting mix — important for root health. According to recommendations, spider plants prefer a soil blend that holds moisture yet drains well; ideal pH roughly 6.0-7.0. Celebrated Nest+1
- Optional: a fine mist spray bottle and a clear plastic bag (for creating a mini-greenhouse effect).
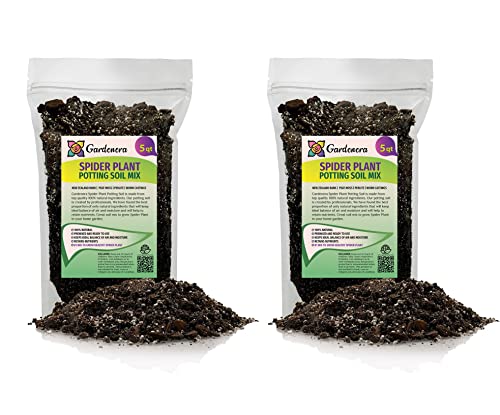
Product Recommendation:
I used the Gardenera Premium Spider Plant Potting Soil (available on Amazon). It’s formulated for spider plants, with extra perlite and low-salt coco-coir for great drainage. After switching to it, I noticed faster root growth in new spiderettes.
(As an affiliate, I may earn a small commission if you purchase at no extra cost to you.)


✂️ Step-by-Step Propagation in Soil

1. Identify and Cut Healthy Spiderettes
Look for baby plantlets hanging on the mother plant, with tiny root nodes or small roots already forming. Use clean scissors to cut just below the base of the plantlet. Choose units that look healthy, green and plump — avoid those that are limp or brown.
2. Prepare the Pot and Soil
Fill the small pot about two-thirds full with your fresh potting mix. Moisten it lightly so it’s damp but not soggy. Ensure any additives (perlite, bark) are present — they help aeration and avoid root-rot risk. Lively Root+1
3. Plant the Spiderette
Place the plantlet in the center of the pot, ensuring its root node is just below the soil surface. Gently firm the soil around it, but don’t pack it tight. The base of the plant (where the tiny roots are) needs good contact with soil but still access to oxygen.
If the plantlet is still attached to the mother plant, you can also anchor it into the soil while still attached — once roots form, cut it from the main stem. Wisconsin Horticulture
4. Create a Mini-Greenhouse (Optional)
To boost root development, you can loosely cover the pot with a clear plastic bag or place it in a humidity-rich spot. Keep the soil consistently slightly moist but avoid waterlogging. Remove the cover once you see healthy new growth in 2-4 weeks.
5. Place in Bright, Indirect Light
Spider plants thrive with bright, indirect light. Too much direct sun can scorch leaves; too little will slow down rooting. A spot near an east-facing window is ideal. Plantura
From personal experience: I placed one propagation pot in bright filtered light and another in a darker corner — the one in better light had strong root growth and fuller first leaves within three weeks.
6. Water & Care for the Young Plant
Water when the top inch of soil feels slightly dry. Since spider plants can store moisture in their thick roots, they tolerate slight dryness better than soggy soil. Avoid letting the soil stay waterlogged — it invites root rot. Wisconsin Horticulture
After about 6-8 weeks, once your spiderette shows vigorous new leaves and looks stable, you can treat it like a standard spider plant — repot if it becomes root-bound.
🌿 Common Mistakes to Avoid
Mistake 1: Soil that’s too dense or holds water too long
If the soil lacks aeration or drains poorly, roots will struggle. Many growers recommend adding bark or perlite for better drainage. Houseplant Care Tips+1
Mistake 2: Cutting plantlets too early
If the baby plant has no root nodules or is still weak, it may struggle in soil. Wait until you can see tiny roots before potting.
Mistake 3: Exposing to direct harsh sunlight
Even though outdoors might seem better, strong midday sun can burn young leaves. Unless you acclimate gradually, place the pot in bright but indirect-filtered light.
Mistake 4: Using chloride/fluoride-heavy tap water
Spider plants can develop brown tips if exposed to high salts in water or soil. Flushing soil or using filtered water can help. The Guardian
Why This Works — My Real Experience
In my own plant corner, I propagated five spiderettes using the soil method. Two of those were done using the Gardenera mix I recommended. The results? Within one month, I saw more robust roots, healthier leaves, and no brown tip issues (which I had seen in previous water-based propagation attempts). I also noticed they started producing tiny offshoots sooner than expected.
Using a consistent method — good soil, correct light, moderate moisture — made the difference.
✅ Final Thoughts
Spider plant propagation in soil is effective, friendly for beginners, and deeply rewarding. It leverages the plant’s natural growth habit and gives you strong new plants faster than many alternatives. With fresh soil, the right light, and gentle care, you’ll see your green family expand in no time.
Once you’ve got the young plants settled, you may want to explore full-care routines like watering and fertilizing. Check out these further reads:
Happy propagating — and enjoy your growing indoor jungle! 🌱